From Wood to Wonder: How a PRS Guitar Neck Comes to Life

PRS   |   September 19, 2024

posted by: Levi

Ever wonder what it takes to create the neck of a PRS guitar? If you’ve ever held one in your hands, you know how important that neck is—it’s the connection between you and the music you make. In this blog post, we’ll take you behind the scenes at PRS Guitars, where we’ll walk you through the step-by-step process of crafting a guitar neck, straight from the factory floor. Ryan Whaley, the 2nd Shift Woodshop Manager at PRS, gives us the full tour, showing how raw wood transforms into a finely crafted neck, ready to be played.

The Journey Begins: Rough Cut and Preparation

The process starts in the rough cut area, where large shipments of wood arrive and are cut down into neck blanks. These rough pieces are then placed in a hot room for a few days. The heat helps stabilize the wood by removing moisture, which is crucial for ensuring that the neck remains stable over time. Once they’ve had a good bake, the blanks are ready to move onto the factory floor for the next steps.The next stop is prepping the blanks for the CNC (Computer Numerical Control) machine. A skilled worker like Herman, who has years of experience, carefully marks the wood for relief cuts that will later become the “ears” of the headstock. This attention to detail ensures that the wood grain and color match perfectly, resulting in a cohesive, beautiful finish. The blanks are then stacked and labeled, ready for the precise work of the CNC machine.

Precision Meets Craftsmanship: CNC Cutting and Truss Rod Installation

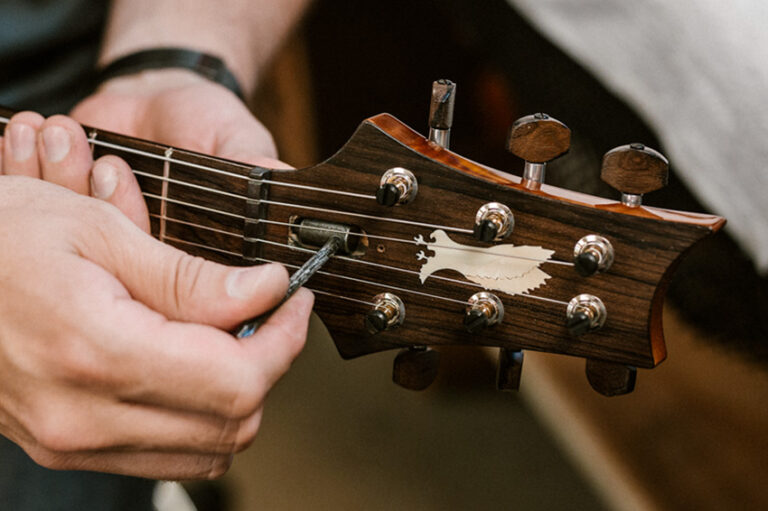
The neck blanks are now ready for their first run through the CNC machine. This high-tech equipment is used to fly-cut and level the top of the neck blanks, carve out the truss rod channel, and start shaping the headstock. It’s here that the neck starts to take on its familiar shape, with each pass of the CNC adding more detail.Once the truss rod channel is carved, it’s time to install the truss rod—a crucial component that allows for adjustment of the neck’s curvature, ensuring optimal playability. Brian, another seasoned PRS team member, meticulously checks each truss rod channel for cleanliness before fitting the truss rods. This careful inspection is key because any debris or unevenness could impact the neck’s performance. After inserting the truss rods, the necks are pressed to ensure a secure fit, then left to dry for a few hours.

Bringing It All Together: Ear Installation and Further CNC Work

After the truss rods are installed and the necks have dried, the next step is attaching the “ears” to the headstock. These are the pieces that extend the width of the headstock, and they need to be perfectly matched in grain and color to the rest of the neck. The ears are hand-clamped and left to dry overnight, ensuring a seamless look.With the ears in place, the necks go through another round of CNC work. This stage involves refining the headstock shape and drilling the holes for the tuning pegs. The CNC machine also trims and shapes the back of the neck, gradually bringing it closer to its final form.

Fine Tuning: Fingerboard Glue-Up and Carving

The next major step is attaching the fingerboard. Before gluing, the neck and fingerboard are dry-fitted to make sure everything lines up perfectly. Then, a special two-part epoxy is applied to ensure a strong bond with no gaps. Once the fingerboard is glued in place, it’s pressed down and left to dry, just like the truss rods.After the glue has set, the necks are ready for the final CNC carve. This is where the neck’s signature PRS shape really comes to life. The CNC machine carefully carves the neck’s contours, trims the heel, and refines the headstock, making sure everything is smooth and perfectly aligned. Following this step, the necks are set aside for another couple of days to allow any final wood movement to settle before moving on to the next stage.

The Finishing Touches: Sanding, Fretting, and Quality Control

Once the necks have had time to settle, they undergo hand-sanding to refine the shape and ensure a smooth finish. This step is crucial for achieving the comfortable feel PRS necks are known for. Sanding is followed by the fretting process, where individual frets are carefully glued and pressed into the fingerboard. Attention to detail here is key; the frets must be perfectly seated to avoid any buzzing or unevenness when the guitar is played.The final touches involve applying a veneer to the headstock, which adds both strength and aesthetic appeal. The veneer is carefully glued and clamped, ensuring it’s perfectly aligned and free of gaps. Once the veneer is dry, it’s trimmed and cleaned up, with any excess glue removed to leave a pristine finish.

Quality Control: Ensuring Perfection

The last step in the neck-building process is quality control. At PRS, every neck is inspected multiple times throughout the process, but the final check is where any remaining imperfections are addressed. Whether it’s a slight unevenness in the sanding or a fret that needs a final adjustment, this is where the PRS team makes sure each neck meets the company’s high standards.David, one of the QC experts, takes his time inspecting each neck, checking everything from the headstock veneer to the fret seating. If any minor adjustments are needed, they’re made on the spot. Only when everything is perfect does the neck get the final approval and move on to be joined with the guitar body.

Wrapping It Up: Crafting the Perfect Neck

Building a PRS guitar neck is a meticulous process that combines state-of-the-art technology with the hands-on craftsmanship of experienced luthiers. From the initial rough cut to the final quality check, every step is designed to create a neck that not only looks beautiful but also delivers the exceptional playability that PRS guitars are known for.At Tone Tailors, we’re proud to carry PRS guitars, and we know that each one is a work of art. Whether you’re a longtime PRS fan or new to the brand, we’re here to help you find the perfect guitar. Stop by our shop in Lititz, PA, or explore our online store to see our selection of PRS guitars, and feel the difference that a finely crafted neck can make.

Can't Get Enough? Keep reading...

From Garage Workshop to Boutique Empire: The PRS Origin Story

Read Now

PRS Introduces the SE CE 24 Standard Satin: Timeless Tone Redefined

Read Now

The PRS Amplifier Range: A Tone for Every Player

Read Now

The PRS Horsemeat Pedal: Organic Overdrive With Exceptional Tone-Shaping

Read Now

Leave a Reply

Your email address will not be published. Required fields are marked *

Back to Top